
Why Your Seedlings Keep Dying Before They Get Going

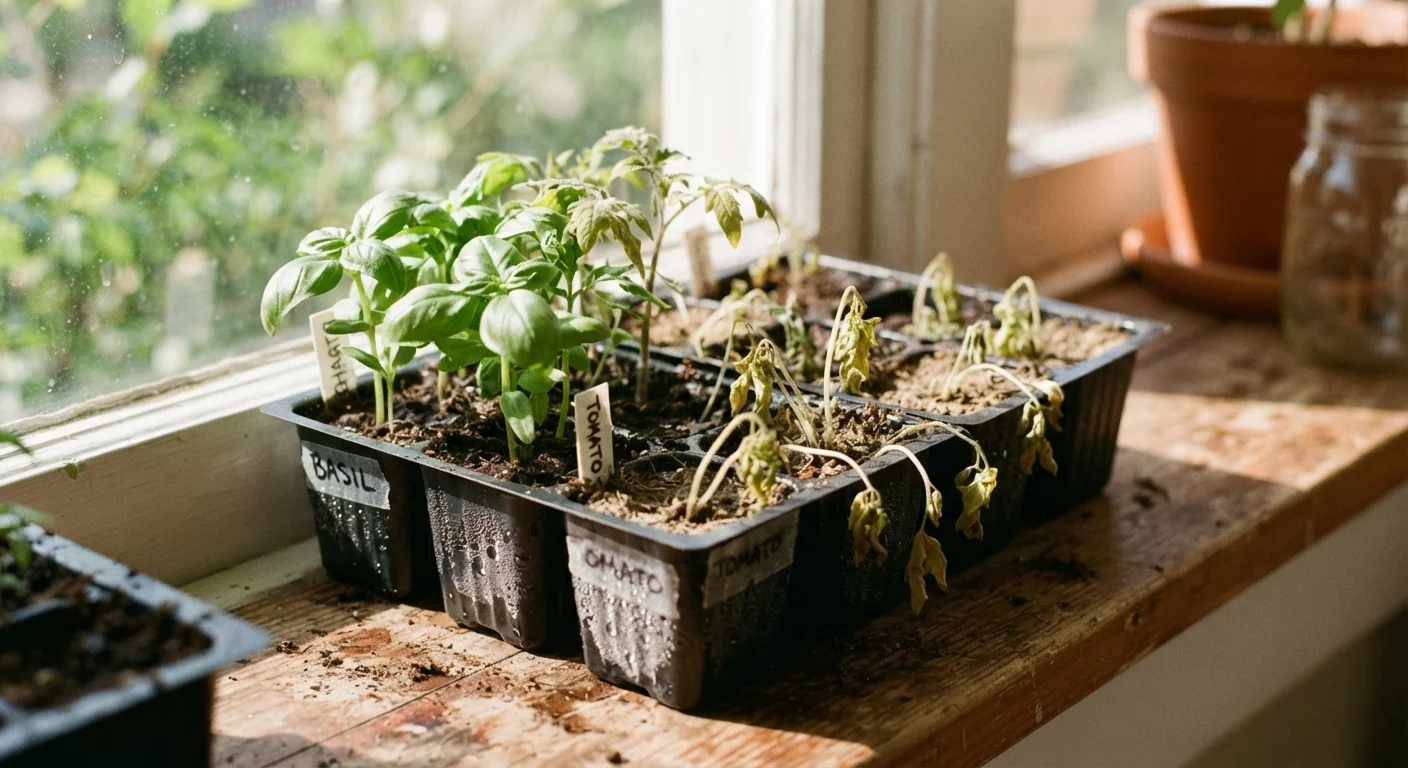
Photo: InsightsTurbo.com | Kickstart Your Knowledge Quest editorial
Key Takeaways
- Most seedling failures trace back to a handful of fixable mistakes, not bad luck.
- Overwatering is the single most common cause of seedling death among new growers.
- Light quality and quantity matter far more than most beginners realize.
- Starting seeds too early indoors often produces weak plants that struggle after transplant.
- Using the wrong growing medium can suffocate roots before plants have a chance.
What's Actually Going Wrong With Your Seedlings
If your seedlings keep collapsing, going pale, or simply stalling, you're not alone - and it's almost never bad luck. The most common seedling problems share a short list of causes, and once you recognize them, they're genuinely fixable. Whether you're starting your very first garden or repeating mistakes from last season, the guidance below will help you understand what went wrong and how to do better next time.
Seedlings are at their most vulnerable in the first two to three weeks of life. They need the right balance of moisture, light, warmth, and air - and even one of those factors being off can cause rapid decline. The encouraging part: most of these mistakes are easy to correct once you know what to look for.
Damping Off Is Irreversible
The Most Common Mistakes - and How to Avoid Them
The mistakes below are the ones our editorial team sees most often when new growers describe their seedling troubles. Each one has a clear cause and a practical fix.
Overwatering seedlings by keeping the soil constantly wet.
Providing insufficient or low-quality light, producing tall, floppy seedlings.
Starting seeds indoors too many weeks before the last frost date.
Using regular garden soil or potting mix in seed-starting trays.
Skipping hardening off before transplanting seedlings outdoors.
90%
Of seedling failures linked to watering or light
Horticulture extension programs at US land-grant universities consistently report that moisture mismanagement and inadequate light account for the vast majority of indoor seedling failures reported by home growers.
7-10 days
Recommended hardening-off period before transplant
Most cooperative extension guidelines recommend a gradual one-to-two-week outdoor acclimatization period to prevent transplant shock in seedlings grown indoors.
Setting Your Next Round of Seedlings Up for Success
Once you've identified which of these mistakes affected your plants, the fix is usually straightforward. Start with fresh, sterile seed-starting mix, water from below, and get a proper grow light if your windows don't deliver consistent brightness. If you're deciding between growing setups, our comparison of raised beds versus in-ground planting can help you choose the environment that gives your seedlings the best shot once they're ready to go outside.
It also helps to start with plants that have a strong track record. Our guide to easy vegetables for first-season growers highlights crops that tolerate beginner conditions more forgivingly. And before you put anything in the ground, the garden readiness checklist walks you through the prep steps that are most often skipped. Small adjustments in how you start seeds make a bigger difference than any product or shortcut - and most growers see real improvement in their very next tray.
Don't Reuse Last Year's Seed-Starting Mix
The content provided on our blog site traverses numerous categories, offering readers valuable and practical information. Readers can use the editorial team’s research and data to gain more insights into their topics of interest. However, they are requested not to treat the articles as conclusive. The website team cannot be held responsible for differences in data or inaccuracies found across other platforms. Please also note that the site might also miss out on various schemes and offers available that the readers may find more beneficial than the ones we cover.